School-aged kids will practice the art of zentangle in this fun project. Weâve included a free printable to make this mess-free lesson easy for home or classroom use.
The Art of Zentangle
The Zentangle Method is an easy-to-learn, relaxing, and fun way to create beautiful images by drawing structured patterns. We call these patterns, tangles. You create tangles with combinations of dots, lines, simple curves, S-curves and orbs.
Zentangle.com
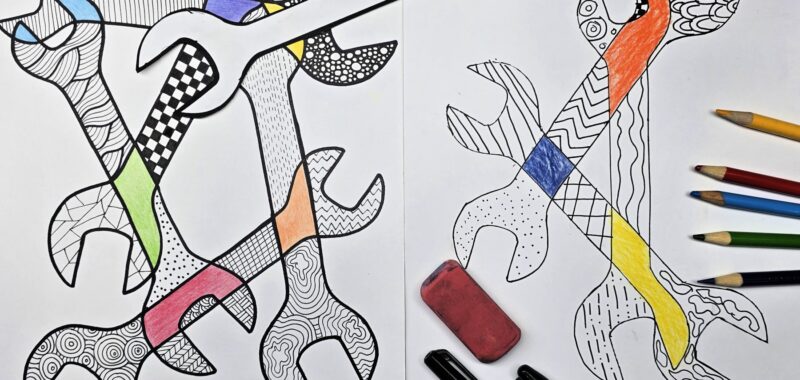
In this project, we are exploring the art of zentangle combined with tool shapes. Kids are free to relax and enjoy their unique pattern creations through the use of lines, dots, and colors.
Related: We offer many free printable Zentangle Coloring Pages!
- Overlapping Tools Pages – Printed on Cardstock (Free Download Below)
- Cardstock
- Fine Tip Permanent Marker
- Colored Pencils, Crayons, or Markers
- Scissors
- Optional: Pencil
Download the Overlapping Tools Printable Here
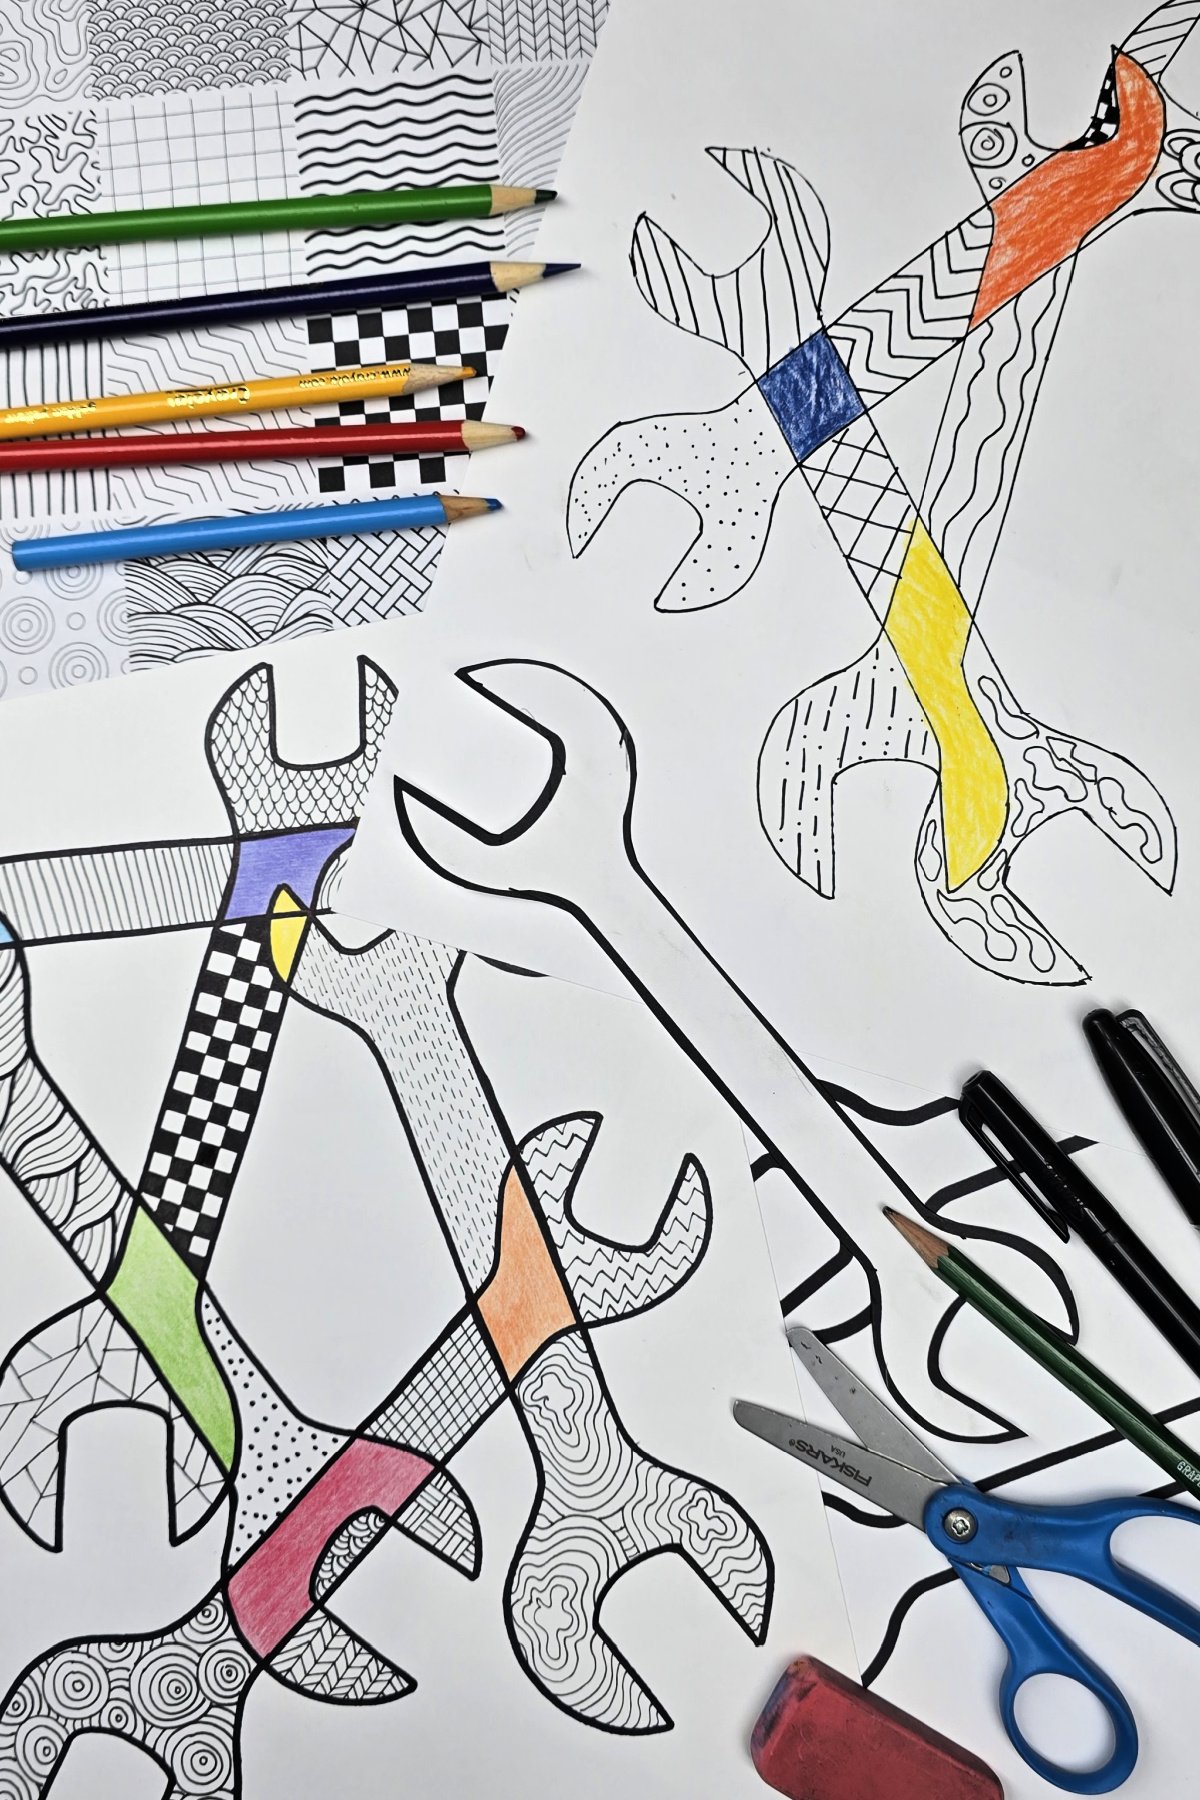
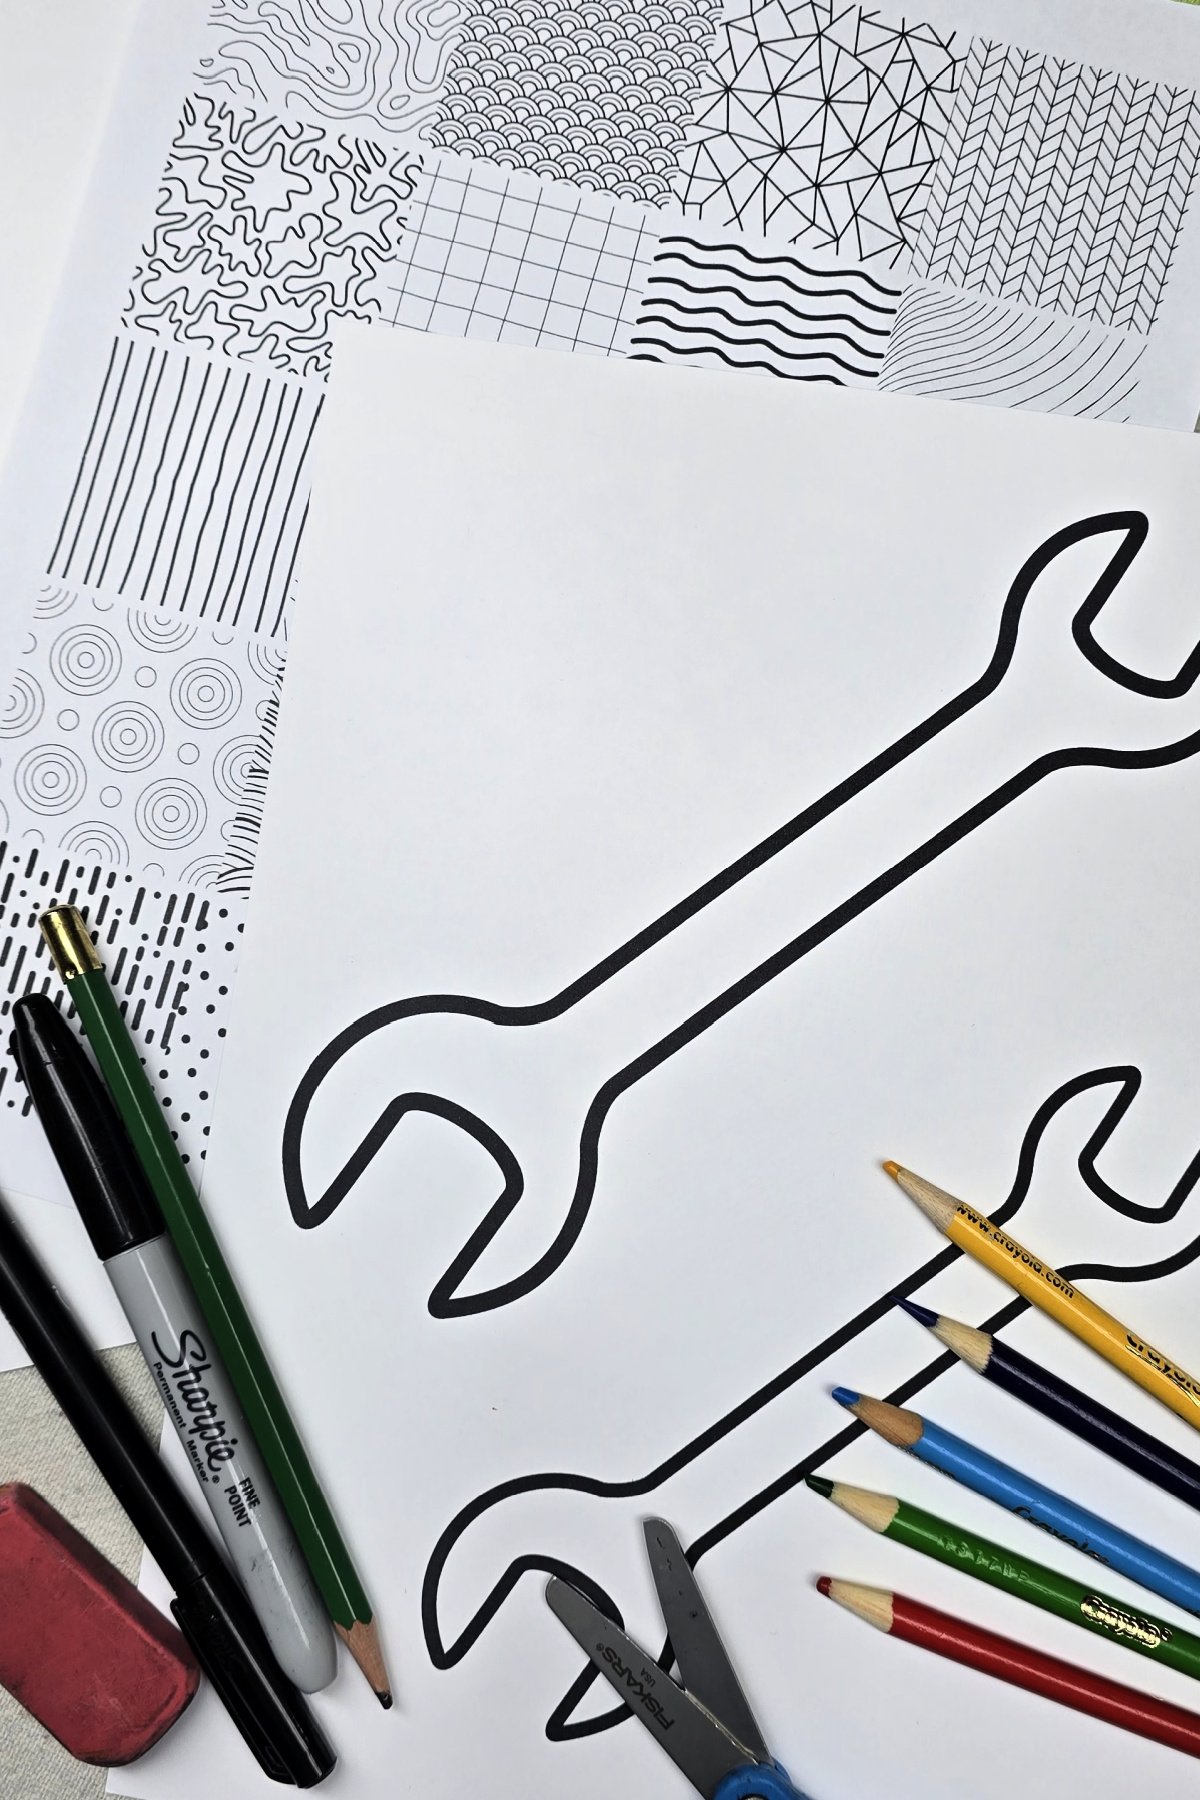
This free download offers a tool shape for kids to trace and creative ideas to start their zentangle drawings. Encourage kids to explore their own zentangle patterns on the back side of the pattern inspiration page. This will give them confidence in their designs prior to drawing on their final project.
Step 1
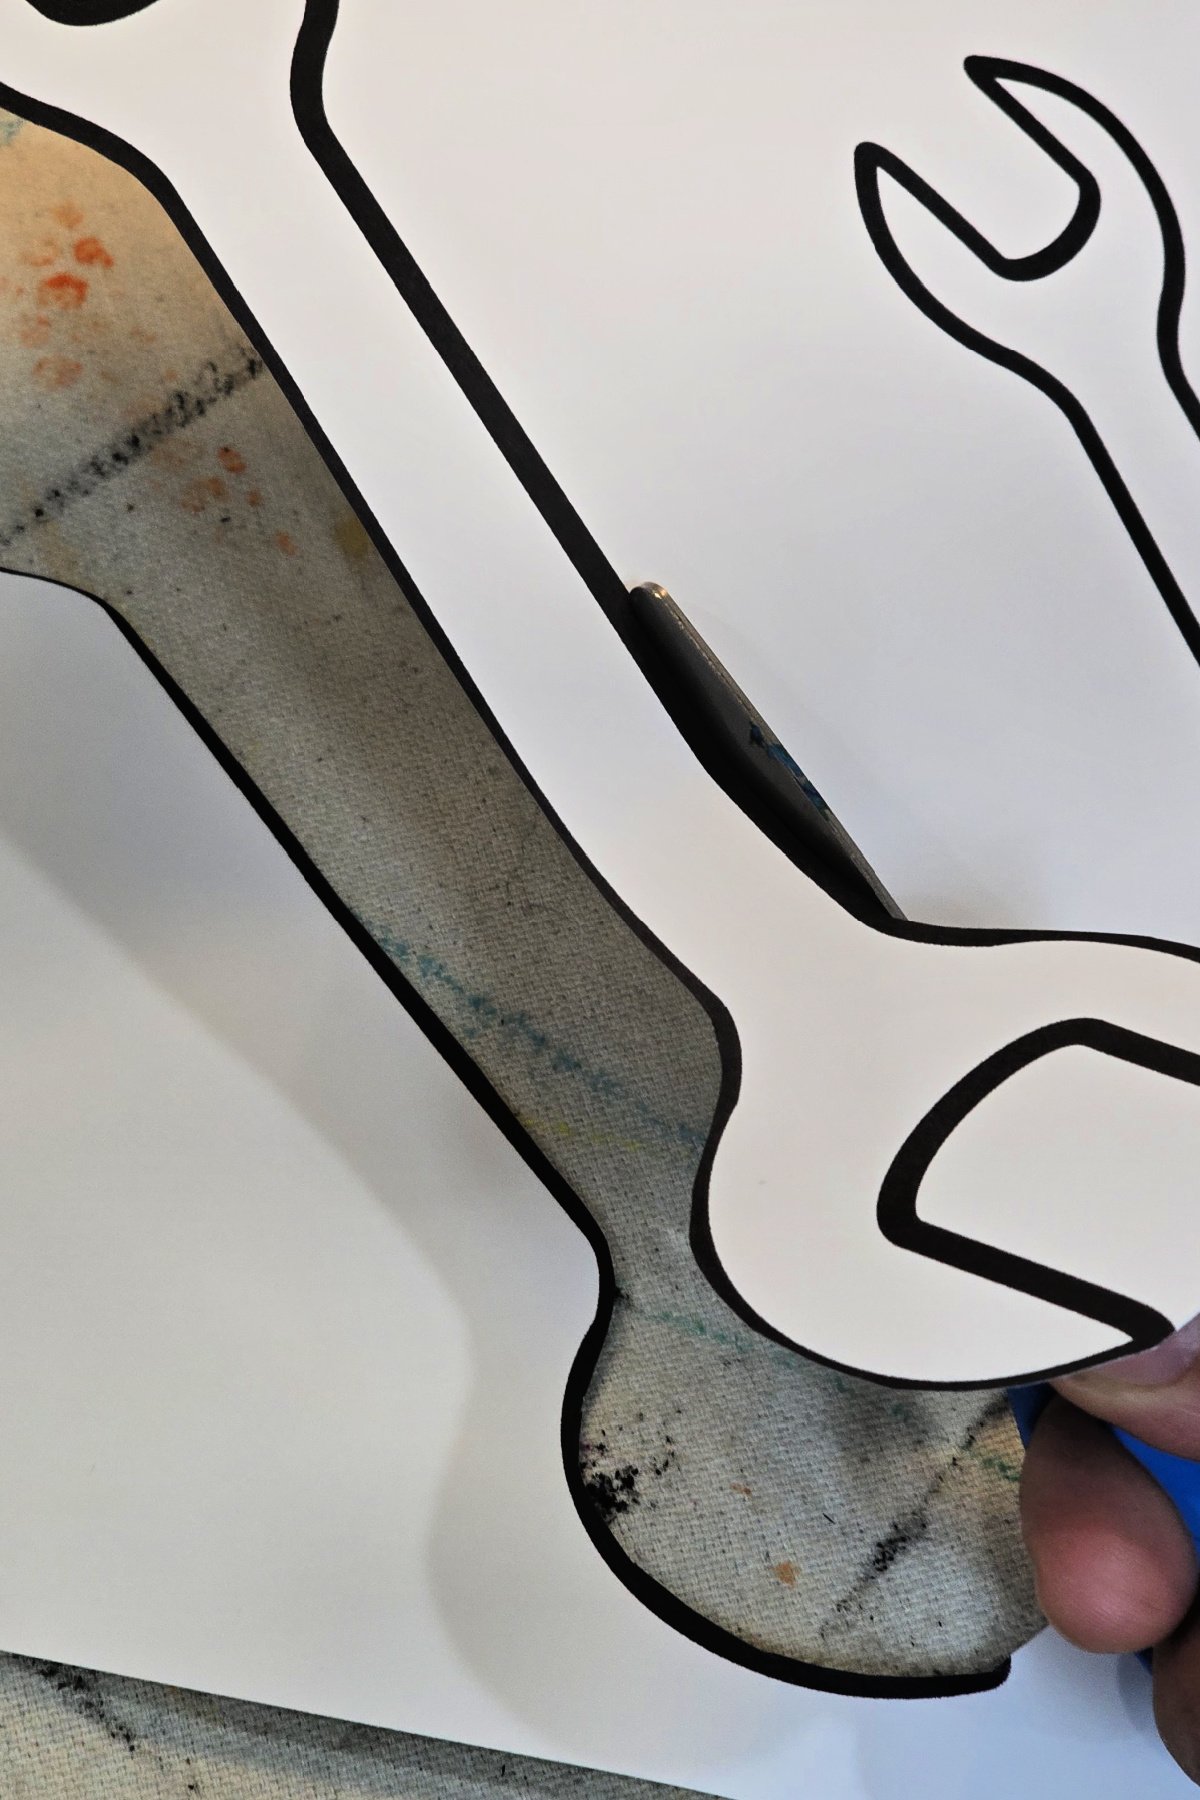
To begin, kids cut tool shapes from cardstock. This will act as a guide for kids to easily trace the shapes onto their page.
Step 2
Next, trace overlapping wrench shapes onto a blank sheet of cardstock. Kids choose the number of wrenches they want on their final design.
Optional: Kids can save time by tracing their shapes with a permanent marker, but this also makes it more difficult to correct any errors.
Step 3
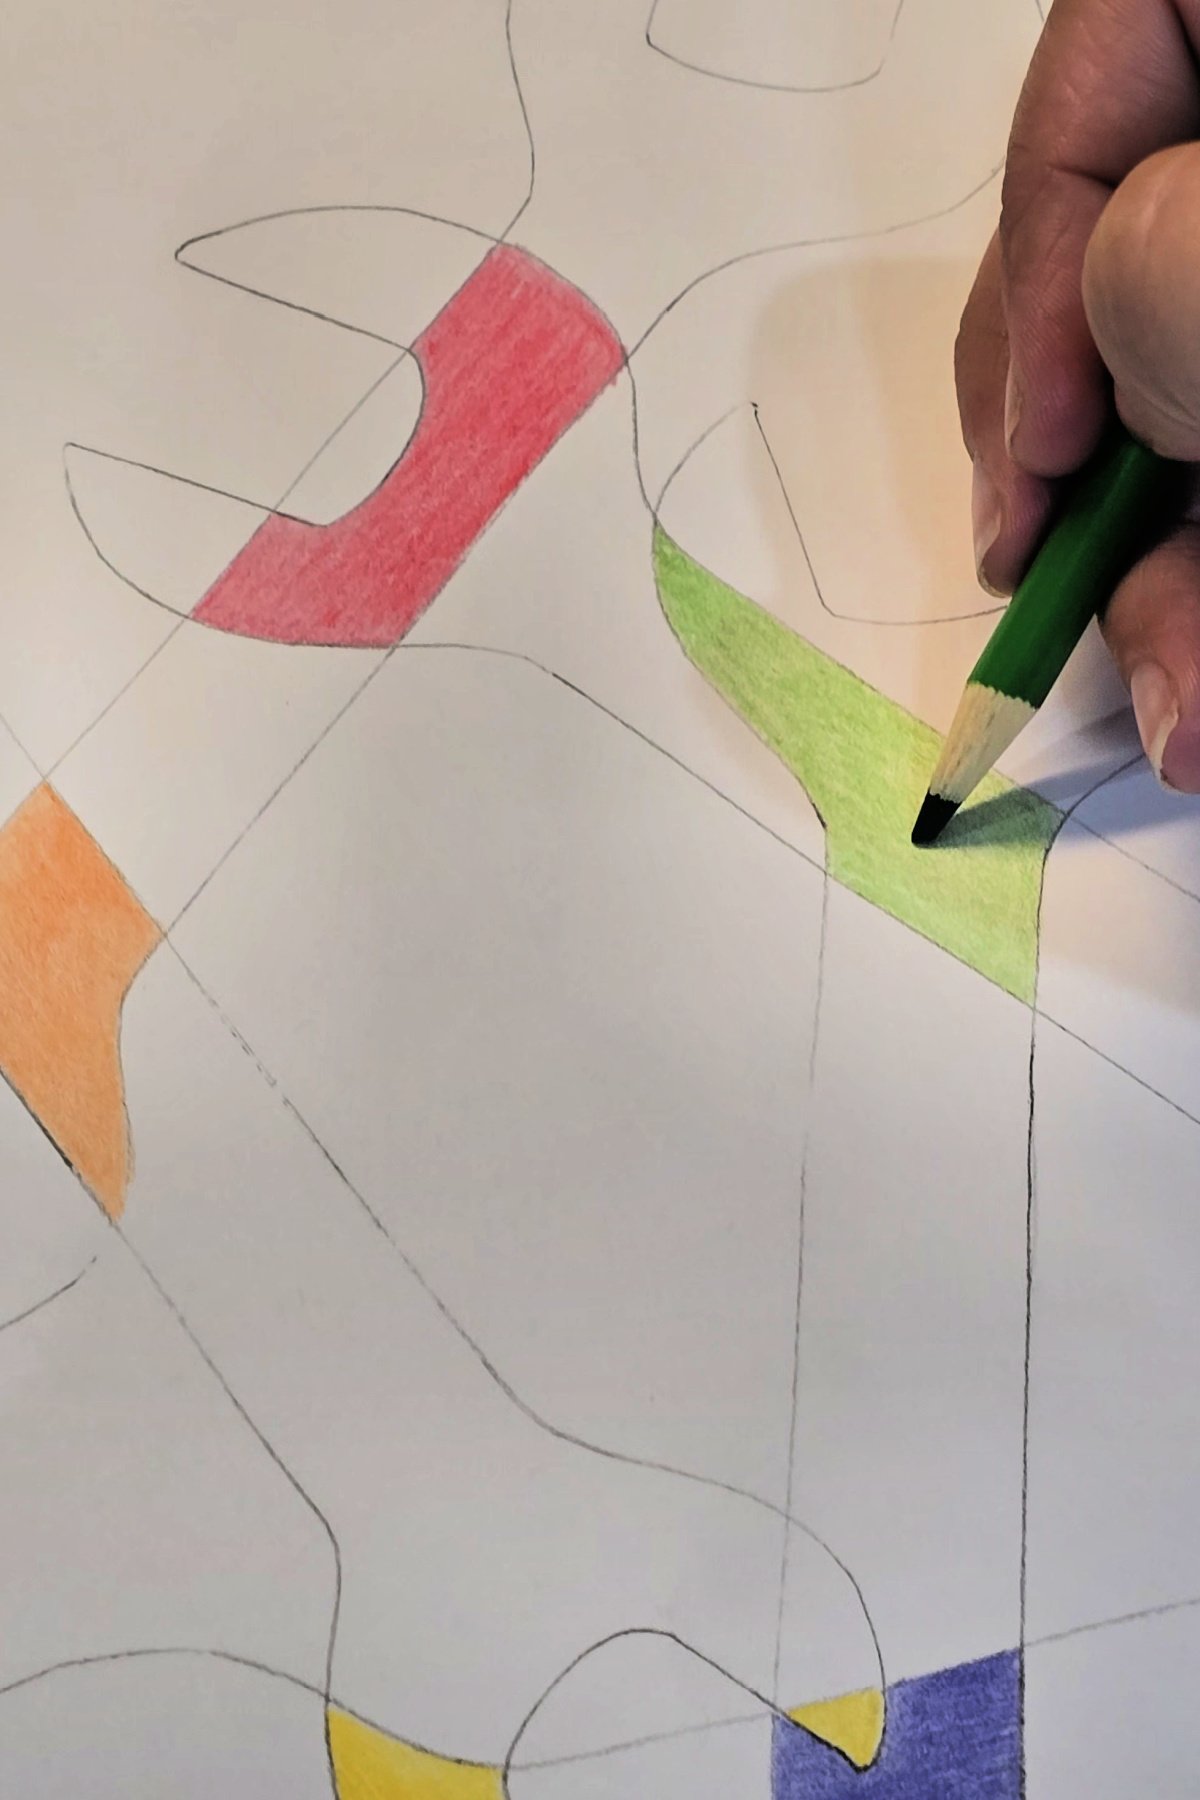
Then, add color to the drawing where tools are shown to overlap.
Step 4

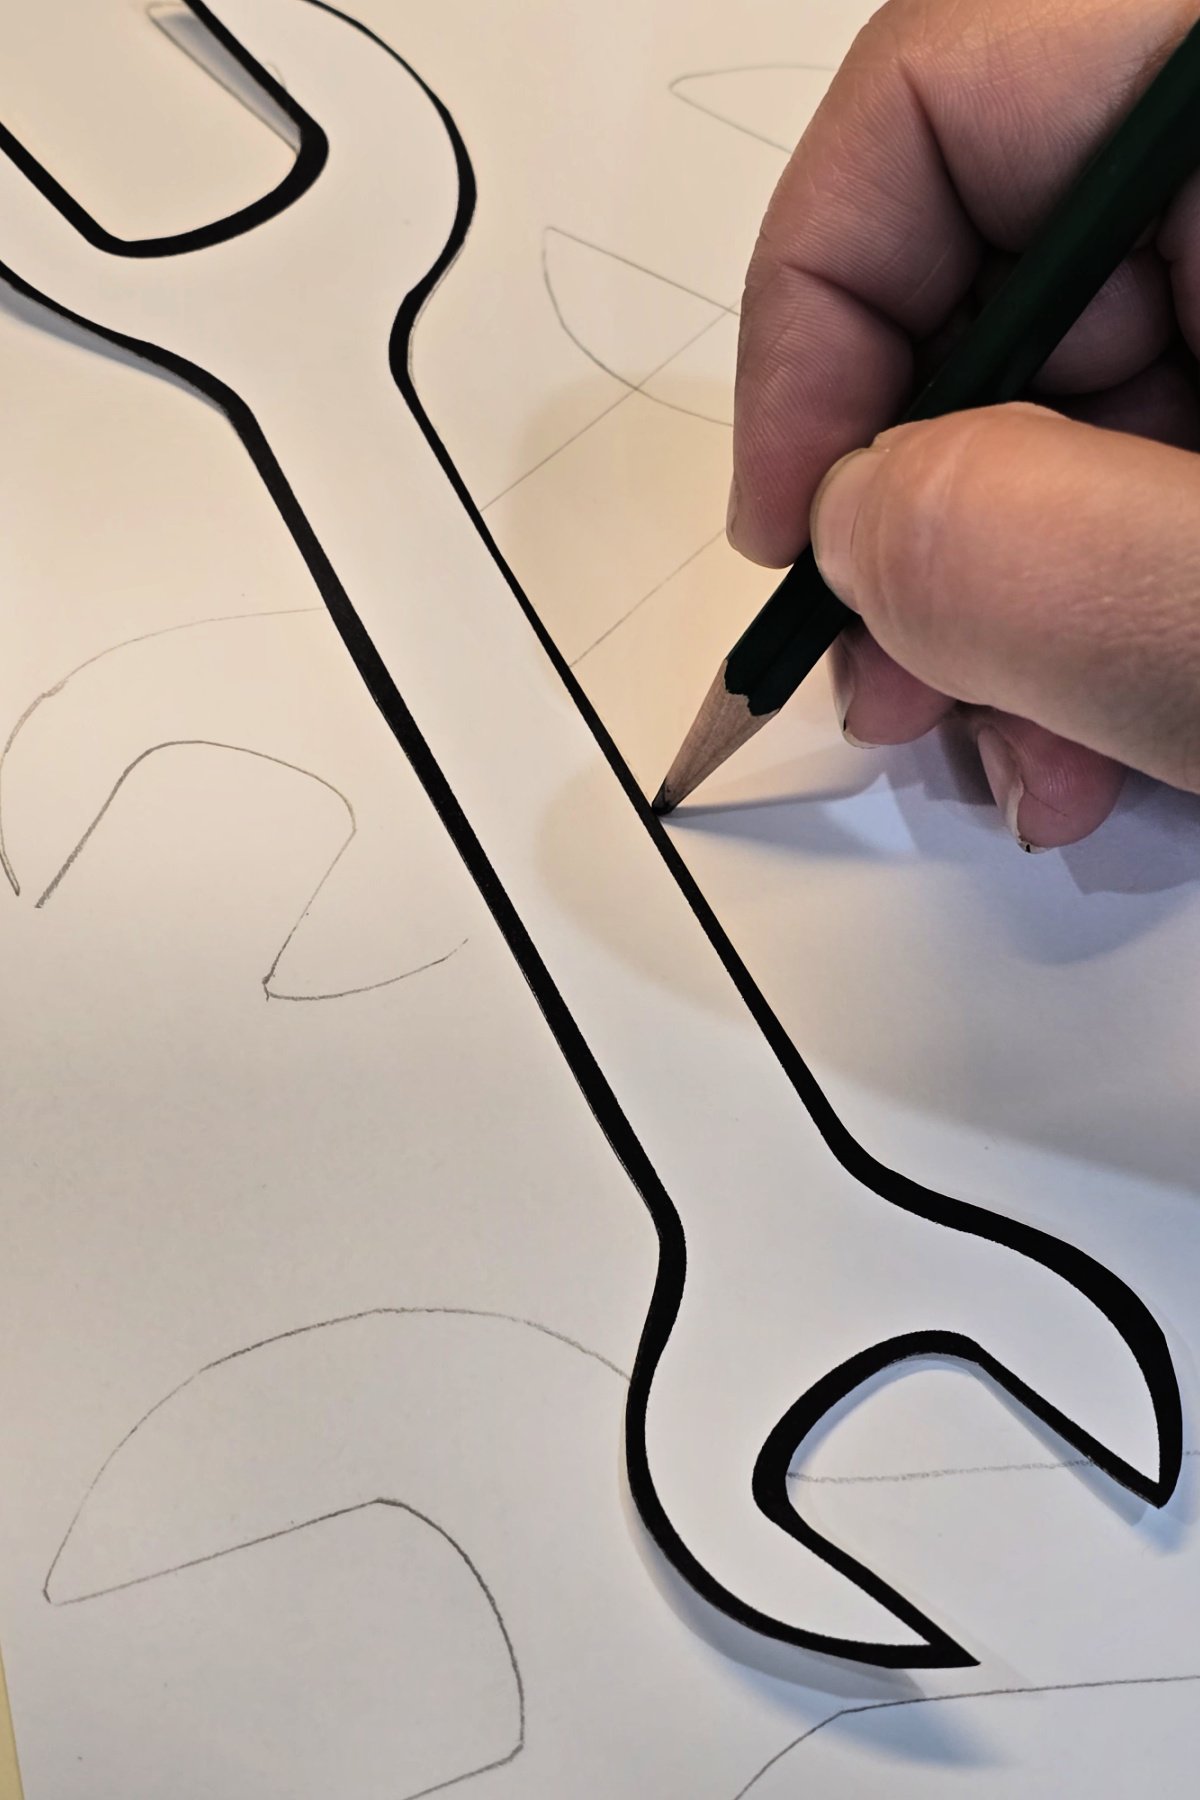
Use a permanent marker to trace shapes.
Step 5
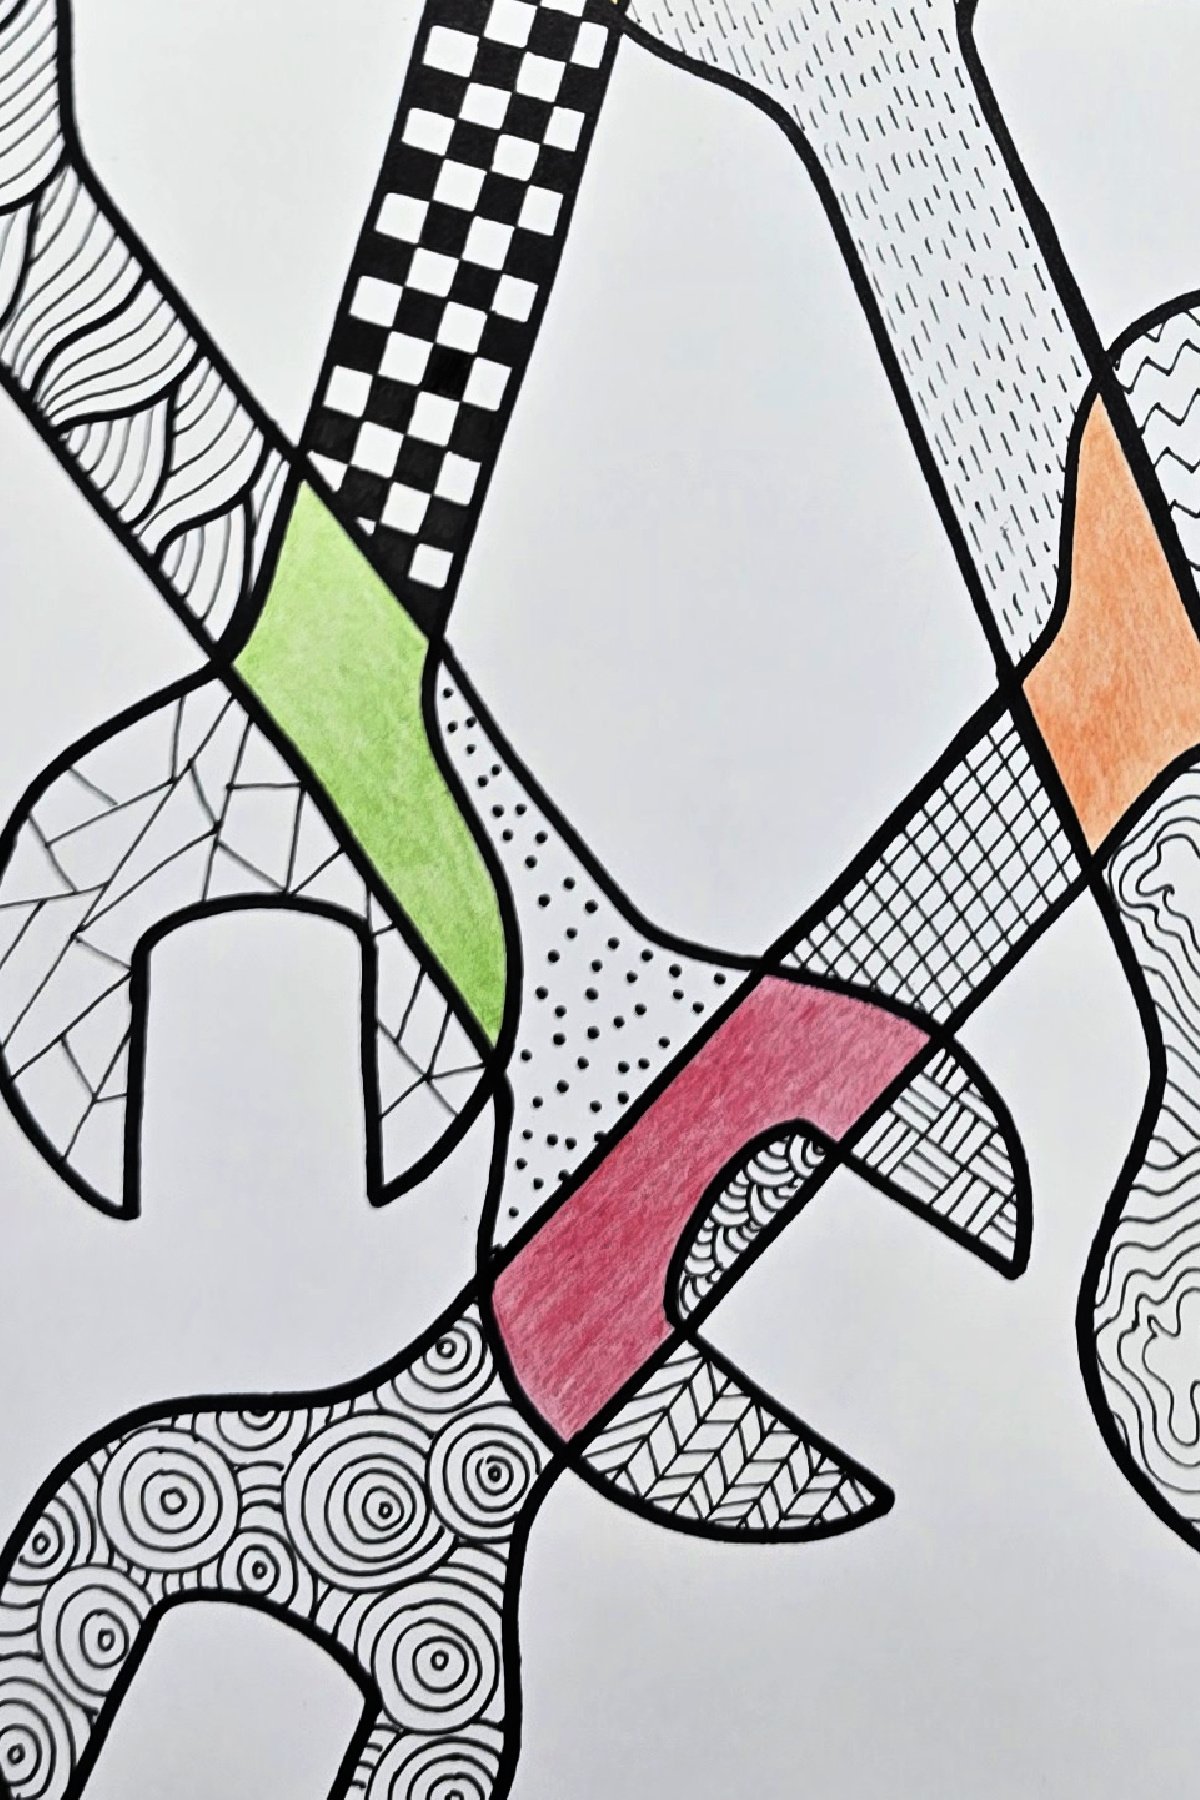
Finally, complete the project by using a fine tip permanent marker to add zentangle patterns to the remaining sections of the wrench shapes.
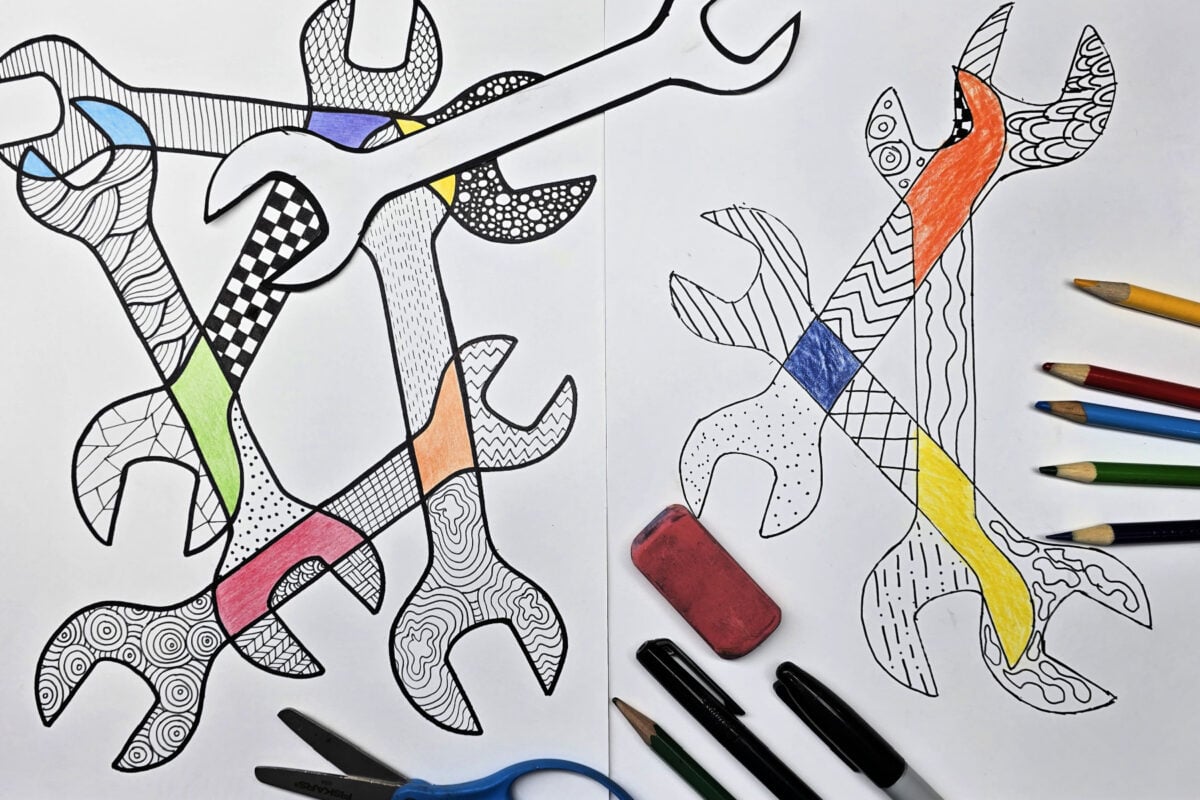
I love how fun and easy this project is! Since this artwork is made on paper, it can easily be framed, clipped, or displayed in your preferred style.Â
This is a fun and easy project that is perfect for Father’s Day. Kids are able to express their creativity and explore the art of patterns while making colorful gift-worthy art!
Prep Time
5 minutes
Active Time
20 minutes
Total Time
25 minutes
Difficulty
Medium
Estimated Cost
$1
Materials
- Overlapping Tools Pages â Printed on Cardstock
- Cardstock
Tools
- Fine Tip Permanent Marker
- Colored Pencils, Crayons, or Markers
- Scissors
- Optional: Pencil
Instructions
- Cut tool shapes from cardstock. This will act as a guide for kids to easily trace the shapes onto their page.
- Trace overlapping wrench shapes onto a blank sheet of cardstock. Kids choose the number of wrenches they want on their final design.
Optional: Kids can save time by tracing their shapes with a permanent marker, but this also makes it more difficult to correct any errors.
- Add color to the drawing where tools are shown to overlap.
- Use a permanent marker to trace shapes.
- Complete the project by using a fine tip permanent marker to add zentangle patterns to the remaining sections of the wrench shapes.
Notes
Overlapping Tools Art Variations
- Combine markers of different sizes to create various zentangle designs.
- Have kids create their own shapes and stencils to fit any theme or holiday.
- Complete project using acrylic paint pens or other mediums.
- Combine markers of different sizes to create various zentangle designs.
- Have kids create their own shapes and stencils to fit any theme or holiday.
- Complete project using acrylic paint pens or other mediums.
Other Fun Drawing Art Projects from Kids Activities Blog
Did your kids have fun making this overlapping tools project? What fun patterns did they create?